This package version requires the following mandatory packages in place before installation.
Skedulo Core Package: 102.56+
Lumary: 19.3.5+
Skedulo AU Healthcare: 1.255+
2cloudnine Payroll: 1.176.9+
2cloudnine Time2Pay Extension: 1.146+
2cloudnine Payroll Base General Ledger Extension: 1.54+
Important notes:
From release version (V1.62), a function was introduced to send Cost Centre from Job Allocation for ACH Group customer.
For other clients, please go to Custom settings → Sage Integration Settings→ check Cost Code Source value. If the Cost Code Source setting is JA then change it to Job
What’s New
Calculate Leave Events in scheduled hours
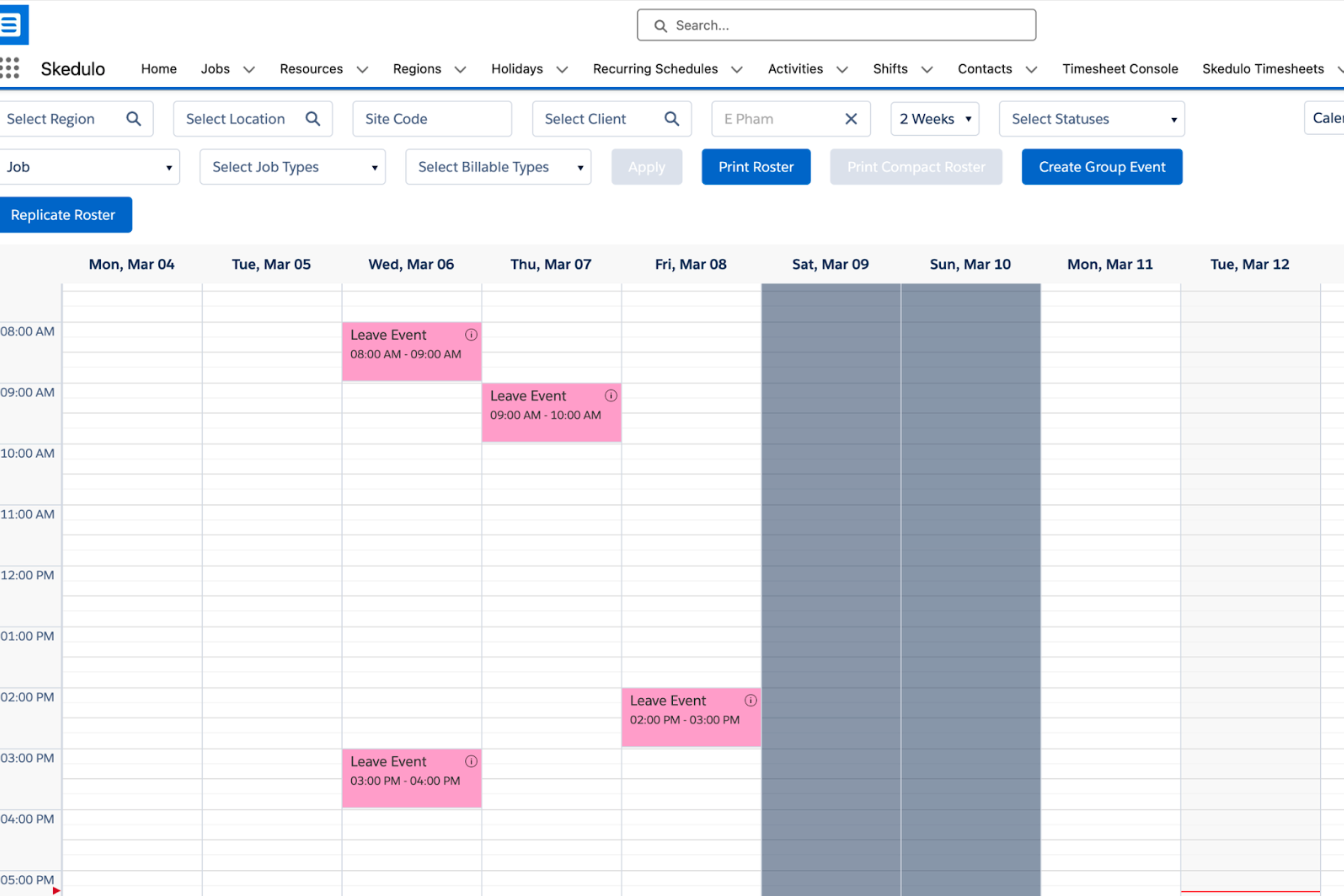
Leave Events are created when Unavailability records are approved and there are underlying jobs. When viewing Scheduled Hours in the various consoles, schedulers now have the option to view the hours including the entire Unavailability record or the hours including only the sum of the related Leave Event records.
For example, an Unavailability record of 24 hours is initially created and approved and as a result, two Leave Events are created reflecting the 2 jobs that fall within this period (2 hours each). There is now the option to either include 24 hours from the Unavailability record into the Scheduled Hours or include only 4 hours of the Leave Events.
Leave Events would only be included, as a replacement for the entire Unavailability record, only when the Unavailability is configured to be payable and included in the Scheduled Hours.
The feature is available on scheduled hour calculations of:
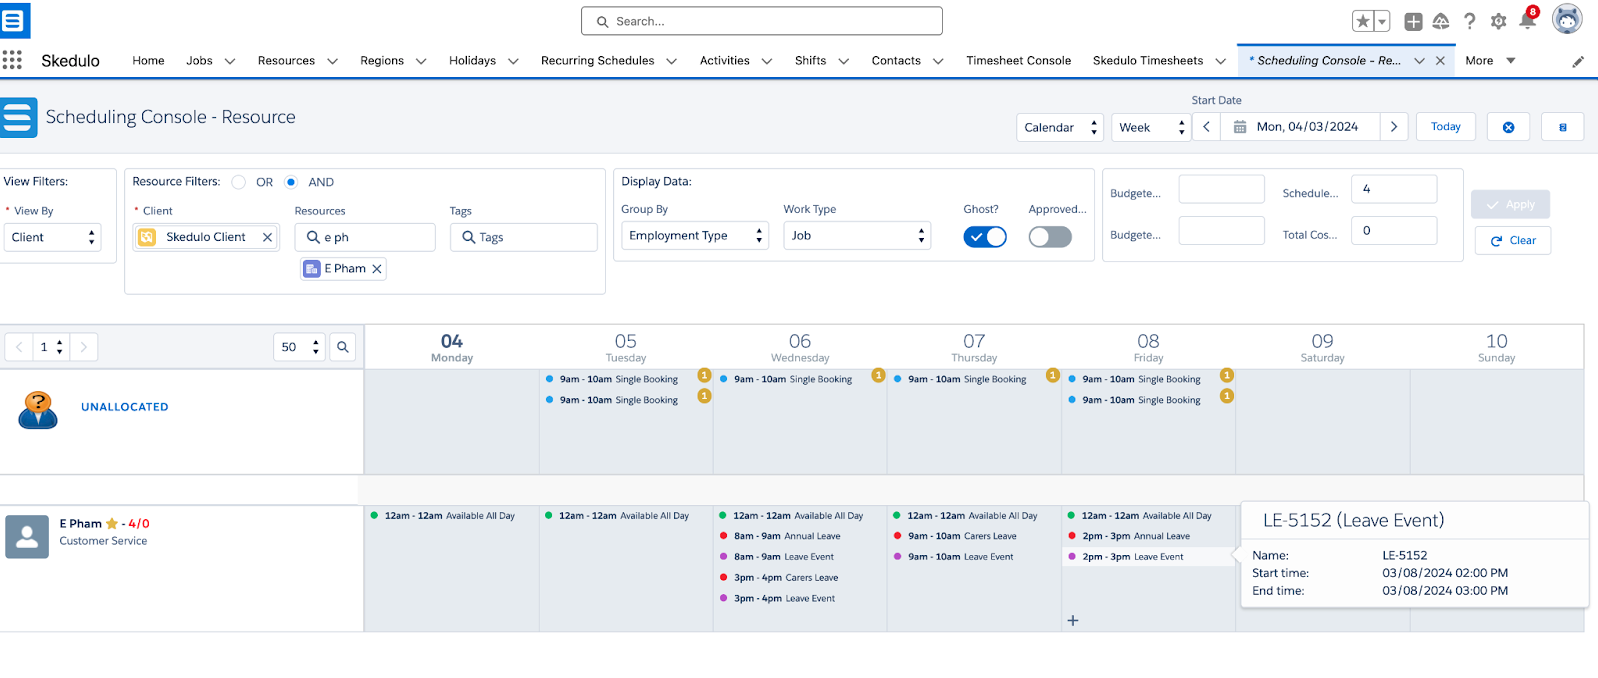
Scheduling Console
Resource Roster Console
Timesheet Console
To set up:
New Healthcare Package (version v1.255+) must be installed.
Custom Metadata Types > sked Interface Handler Settings > LeaveShiftHandler > set the handler name to “skedsg.skedSGLeaveEventHandler”
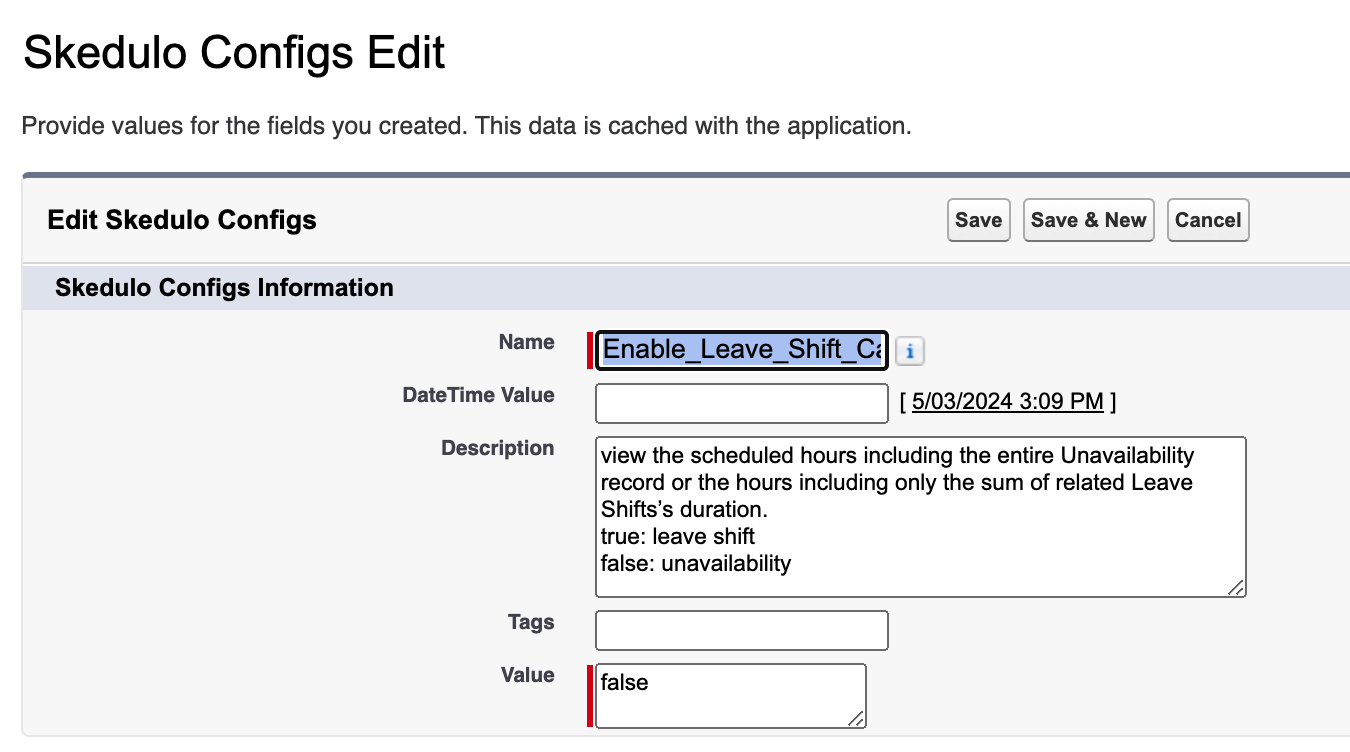
The sole setting Show_Leave_Shifts controls the feature on all consoles.
By default, it is set to False.
Set to True to display Leave Events on consoles.
Generally, on all consoles, Leave Events are being displayed with basic information such as name, start and end date times. The background colours of Leave Events on each console are defaulted to #FFA6CF (HTML colour code) and can be configured following the below settings:
Since this is an existing setting, it was unable to populate the default value #FFA6CF when installing the new version, please set this up manually.
There are no functionalities to edit, create or delete a Leave Event from the consoles. The Leave Event’s hover currently does not support configurable fields.
In order for the Leave Events to be counted towards Scheduled Hours, it is dependent on whether their associated unavailability is payable and configured to be included. (see above Calculate Leave Events in scheduled hours)